Integrate control of ink flow in silk screens (bottom)
Prepared documents
When using the indexing method to generate color separations, it is important to remember that the final size of the dots must match the dot size (also called the pixel size) you defined for the indexed halftones in your design. This means that your image must be color-separated at the final product size and output at a resolution that maintains the dot size.
A good way to test out the size of the dots you can control is to create a test file that should have many different resolutions. Print out this test file and measure its print results to see which of the dots generated on the final product are the best and still able to remain on the screen. The most important thing to remember is that you don't just want to print as small dots as possible; you also need to define outlets that can maintain the best level of tone. This means that you can see the transition of all the values ​​on a grayscale test sample. Smaller dots may mix your midtones (25-65%) and lose some of the differences between the tones, making the image look softer.
An index test file was created in CorelDRAW so that all resolutions can be printed and its sharp edges can be maintained. These bitmaps are imported into the device and printed together to see what their best range of tones is. For test one, I used 230-, 266-, and 305-line/inch mesh counts. It is also possible to expose these test proofs to a number of lower mesh counts to see if they are effective on 180- or 190-line/inch mesh counts. The final test results indicate that the best tunable range is usually achieved at 190 dpi, 305 lines/inch mesh. Your equipment situation will have an impact on the results you get. Therefore, test your own presses and film to define your optimal network coverage.
Once the best print resolution is determined, the XFO image is resized in Photoshop to achieve a resolution of 190 dpi while maintaining the actual print size (without compressing the layer). Then, copy the original file twice and delete all the elements except the chart in a file. These elements may be the part of the printing that requires the use of an indexed halftone because these elements are often printed with graininess. Then delete the chart part in the second copy of the original document, and retain the elements that need to use the traditional halftone, so as to achieve a smooth metal tone and an ideal background light effect. Now consider preparing these documents in advance, because they can be divided into different styles and then reassembled into a final set of positive images.
Separate traditional halftones
Documents that require traditional separations usually consist of grayscale images. Use Photoshop's Curves menu to separate out two grayscales—light and dark—a white highlight and a white substrate. One of the most enjoyable things about using the Curves menu is that it allows us to retain as much of the image information as possible.
Different grayscales can be easily separated by opening and compressing traditional files, then seven new alpha channels are created, and they are individually changed to represent each ink that will be used by changing the channel options. Then copy and paste the files into each channel and edit them using the Curves dialog.
After all the channels have been edited, the final step is to open all the alpha channels and a "shirt color" channel so that you can preview the print effects of the colors and see if they are trapped. One of the downsides of this approach is that Photoshop doesn't really reflect the ink's opacity or the real path of the substrate's work, but it gives you an idea of ​​the big problems that might arise. Finally, these channels are left alone in this file, and I continue to process the index portion of the separation sheet.
Index separation
The key to producing a perfect set of indexed color separations is to create a regular color table that Photoshop can use to separate design drawings. Open the file prepared for indexing the mesh, copy it, and then go to> Image> Mode> Index Color. This opens the dialog box for the index color, so you can close the preview box (otherwise, you can't pick from the original) and choose Custom as a template.
Next, click on the button to the right of the color table and drag the mouse to select the entire table. The color picker menu pops up, selecting white for the first and last color in this table, and resetting all colors to white. When we click on the first white area, the color picker menu pops up, which allows us to use the dropper tool to extract the first index color from the design.
One trick I use on indexed color tables is to extract a saturated color and then extract a deeper color of the same kind. Next, when we come back to create our own base, we just need to choose brown and not need to create a base for the deeper color. This gives us more room for index separation. After processing the color table, we can go back and select the colors that need to be separated, and turn these colors into black in the color table, and turn the other colors into white. Next, copy this image onto the clipboard and paste it as an extra alpha channel in the same file that contains the traditional halftone design.
Combined color separation
After the index meshes and the traditional meshes are placed in the same file, these color separations will soon be merged in the channel menu. What we need to do is: press the control button and click on each channel to select all white information, then invert them, select the appropriate traditional gray channel that matches the color, and add the selected message to this channel in black in. By this method, it is very effective to combine the traditional grayscale halftone (which appears as a grayscale image before entering the printer's RIP) with the indexed color separation sheet.
This method of combining color separations is applicable to many different forms of halftone (commonly used bitmaps, indexes, copper plated lines, lines, diamond dots, square dots, and more). However, if you are integrating two types of non-type dots, it is best to think about the overall situation - rather than waiting for the RIP to output the gray color separation - in order to avoid the emergence of moire. You can achieve this by first converting all your grayscale plates into mesh tones and then combining them together.
The more you mix the separations together, the better the ink flow can be controlled. Once you have mastered the techniques of blending color separations, you will be able to produce the cleanest designs, because the correct form of halftone will help you in all the right places.
Source: Bison
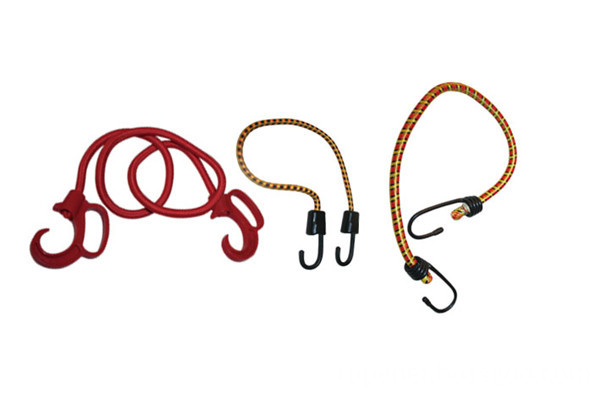
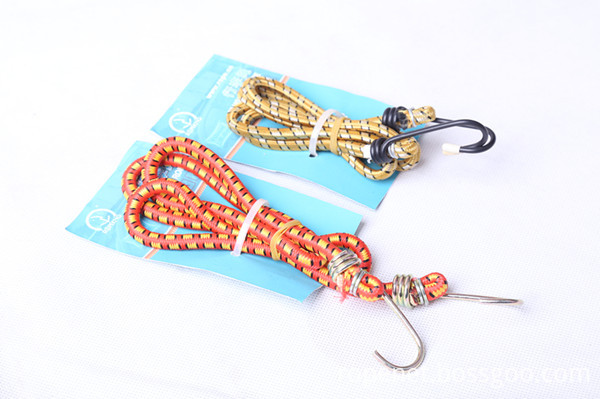
Bungee Cord have many styles. Customers come from different countries have named different, such as Shock Cord, Elastic Rope, rubber rope, elastic rope with hook, bungee rope, Bondage Rope and luggage rope etc.
Features
Light duty
High quality, economical bungees
Assortment includes 4 units 24" (61 cm), 3 units 36" (91 cm), 3 units 48" (122 cm), 6 Mini Bungees, 4 Toggle Balls
SuperStrong overmolded steel core hooks that won't scratch and mark, or lose their shape
Quality rubber that will maintain its elasticity
Double jacket cover for better wear resistance and UV protection


If you have any questions about luggage cord, pls kindly send email to us directly.
Bungee Cord
Bungee Cord,Shock Cord,Elastic Rope,Bondage Rope
ROPENET GROUP CO.,LTD , http://www.cordnet.com